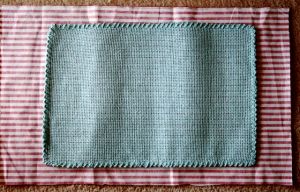
MATERIALS:
placemat (dollar store for cheap ones!!)
Fabric for lining (I just cut a piece that was big enough to fold in the edges)
felt scrap
Snap (and tool to put snap in… you can buy them together in a pack at JoAnn’s or Walmart)
Something cool to adorn/cover the snap!
TIME: This is a one hour/ one nap project
1. Lay the placemat on the fabric and cut. I made the ends longer, because my mom wanted to have the fabric hang over the edge when after I hemmed it.
2. Fold in the long side edges 1x and pin.
3. At the top and bottom edges, fold down the hem once, and then fold in the corners before folding the edge over one more time (encased hem) so that the corners don’t peek out.
( This is what it will look like after folding the edges over again. see how we left it longer on the end so it peeks out from the edge??? I love that detail.)
4. Flip the pinned fabric over so that the wrong side of the fabric is facing the “wrong” side of the placemat (even though there really isn’t a wrong side).
5. Take it to your sewing machine and stitch the lining fabric to the placemat.
6. Fold over one side of the placemat and sew down the edges. Almost done!!!
7. cut out a circle or square from the felt and attach a snap (see instructions on the package)
8. Sew the circle on to the inside of the flap that opens. (see below)
9. fold the opening shut and determine where the other part of the snap should go and mark it. Then attach the snap.
10. attach something to the front to make it look pretty!! I used a felt feather cluster that I normally put on my headbands!! ( I used lots of hot glue to attach it)


